A few month ago I ordered a Raspberry Pi and played with it extensively on the OHM2013 hackers camp during summer 2013. The final project was a LIRC infrared remote control that is controllable using an Android mobile device with the app AMOTE Pro. And because the device should be placed a little away from the hifi console it needed PoE power supply to save an extension cord. After evaluation of a few selfmade options that were not compatible with 802.3af I decided to acquire a professionally built dauther board for the Raspberry Pi from [1].
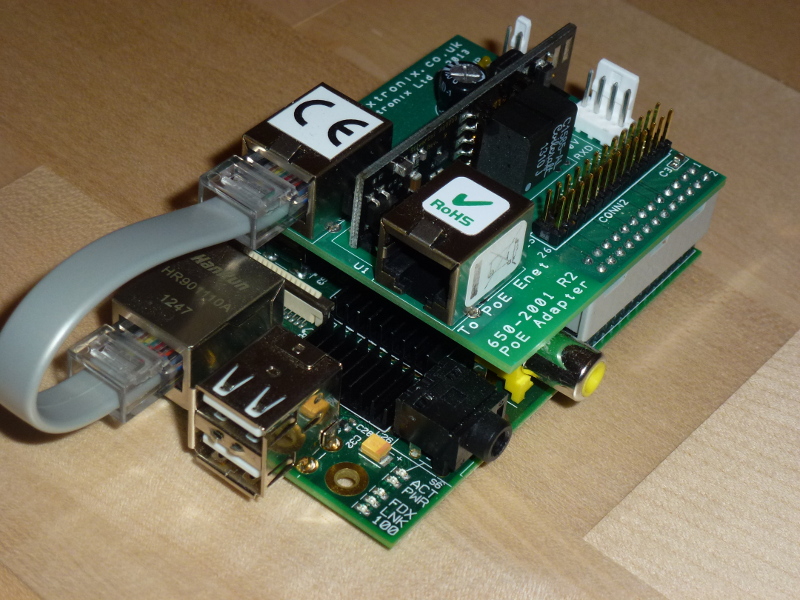
The PoE adapter can directly be mounted on top of the Raspberry Pi and powers the device through the extension port. The GPIO pins are looped through to another connector on top of the PoE adapter and allow their usage without any drawbacks. The PoE adapter is mounted by simply hooking it up the GPIO header and can be fastened with a screw and a provided bolt. The ethernet connection is looped through the PoE adapter with an also provided short LAN cable (see picture). This construction allows the Pi to be powered with up to 1A current - enough to also drive some IR LEDs besides the Raspberry Pi without exhausting the IEEE 802.3af standard.
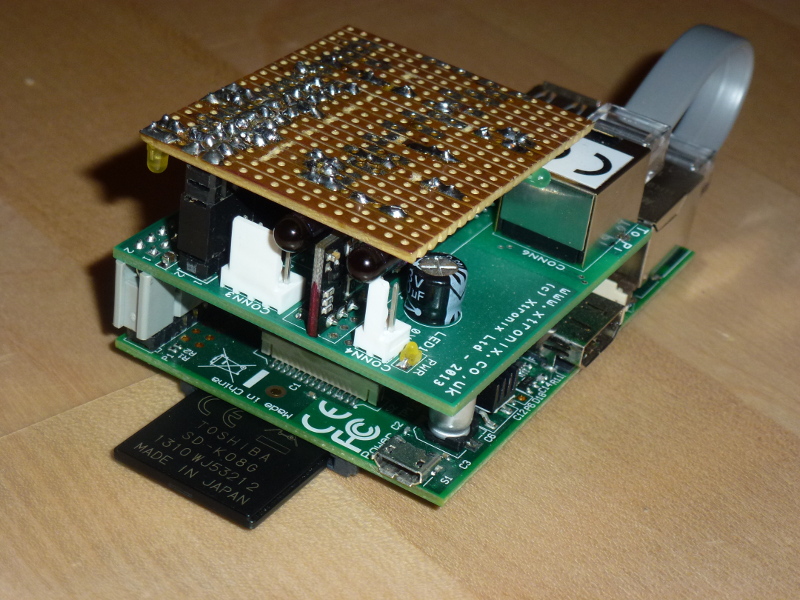
The IR Daugther Board
On top of the PoE adapter I mounted a selfmade PCB with two TSAL 6400 IR LEDs and a TSOP 34838 IR receiver device. The circuit is kept very simple: The TSOP IR receiver is directly connected to the GPIO pin and also directly powered by 3.3V from the GPIO header.
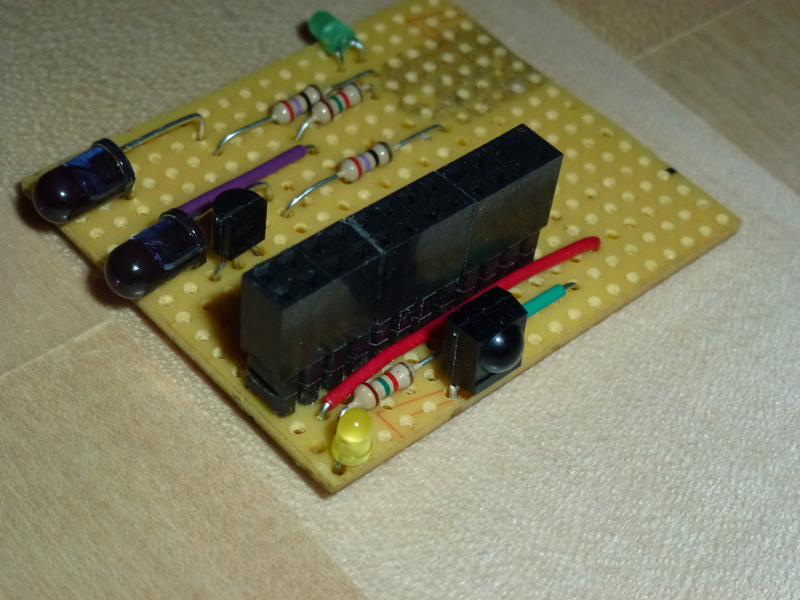
As the IR LEDs for transmitting could draw a few hundred milliamps from the circuit they are driven by an NPN transistor BC547C. And to have an optical feedback when transmitting I also put on a normal green glowing low current LED to the circuit. In my case I used GPIO 4 as output and GPIO 18 as input because the fitted with my PCB ;-). You could also choose any other pin. It is just a matter of loading the LIRC module with the right parameters.
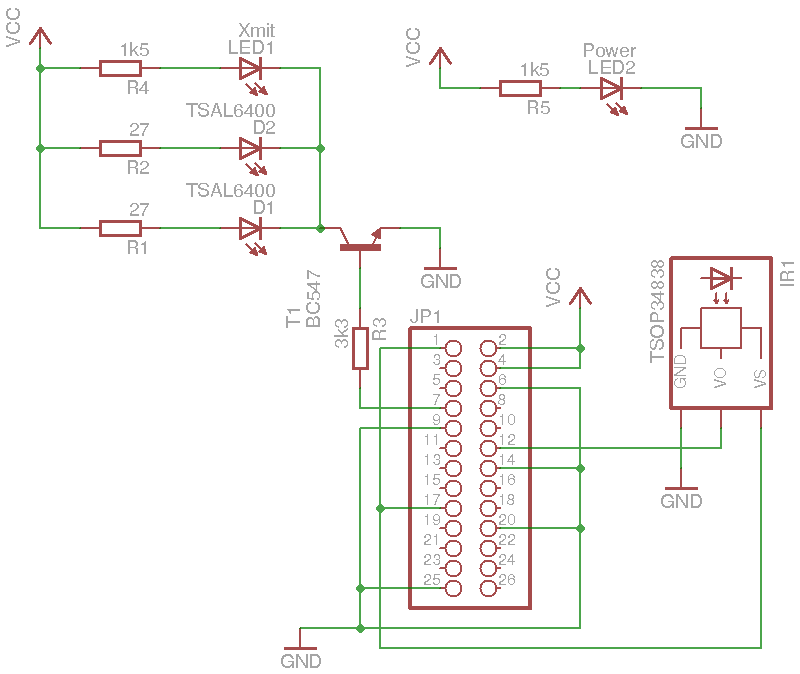
The transistor is driven from the GPIO pin with a 3k3 resistor connecting the base. The IR LEDs connect from 5V via two 27 ohm resistors to the collector and the emitter is attached to GND. The IR control LED (2mA) is inline with a 1k5 resistor. As an option one could wire up a second LED (here yellow) to 5V to signal applied power. The complete schematics can be found in the picture.
Once the hardware is set up and the Raspberry Pi is running LIRC needs to be installed. Furthermode the LIRC modules need to be loaded with some options defining the input and ouput pins. This can be done with two lines in /etc/modules:
lirc_rpi gpio_in_pin=18 gpio_out_pin=4
lirc_dev
A good guide on setting up LIRC on the Raspberry Pi can be found on [2]
LIRC ships with a set of tools to test and record the IR commands from any IR remote. As soon as all needed commands are recorded the LIRC daemon can be set up with the corresponding config. After launching it the daemon listens on port 8765/TCP by default.
Controlling the LIRC daemon
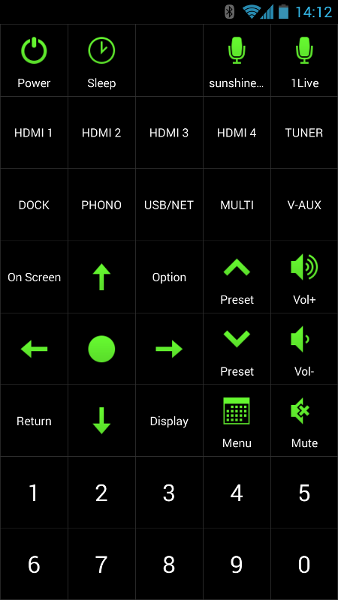
A good example for a web application can be found under [3]. Another setup involving node.js is shown in [4]. A more reasonable client that I use is the Android app AMOTE pro. It can directly talk to the LIRC daemon without involving a web service. The only drawback is that each and every button in the app has to be configured manually to map a corresponding button in the IR remote. But in return the configured setup can be copied via xml file to other devices. The screenshot on the right shows the AMOTE pro user interface. From here your hifi equipment can be controlled from everywhere where there is access to your wireless network or even from the internet through a VPN connection. Have phun =)
References
[1] http://xtronix.co.uk/raspberry-pi-poe.htm
[2] http://alexba.in/blog/2013/01/06/setting-up-lirc-on-the-raspberrypi/
[3] http://randomtutor.blogspot.gr/2013/01/web-based-ir-remote-on-raspberry-pi.html
[4] http://alexba.in/blog/2013/02/23/controlling-lirc-from-the-web/